Hi all!
I’m back with another vlog! I wanted to make a vlog about how I can tomatoes. Since I had tomatoes in my freezer that needed to be preserved for easier use I thought it would be a good time for a video!
Enjoy!
Hi all!
I’m back with another vlog! I wanted to make a vlog about how I can tomatoes. Since I had tomatoes in my freezer that needed to be preserved for easier use I thought it would be a good time for a video!
Enjoy!
Once a year I get the pleasure of looking out my master bedroom doors to my cherry blossom tree.

Not only is it the largest tree on the block but it’s the earliest blooming cherry blossom tree (since my back patio is surrounded by concrete it’s abnormally warm for the area).
I love this tree so much. Not only does it create shade & greenery to my Urban landscape but it gifts me with beautiful pink flowers every year.
This year I did something I always wanted to do: I made a preservative with the cherry blossoms. I went out back & gathered as many cherry blossoms from standing height as possible…& I was pretty proud of myself too! It took all evening!
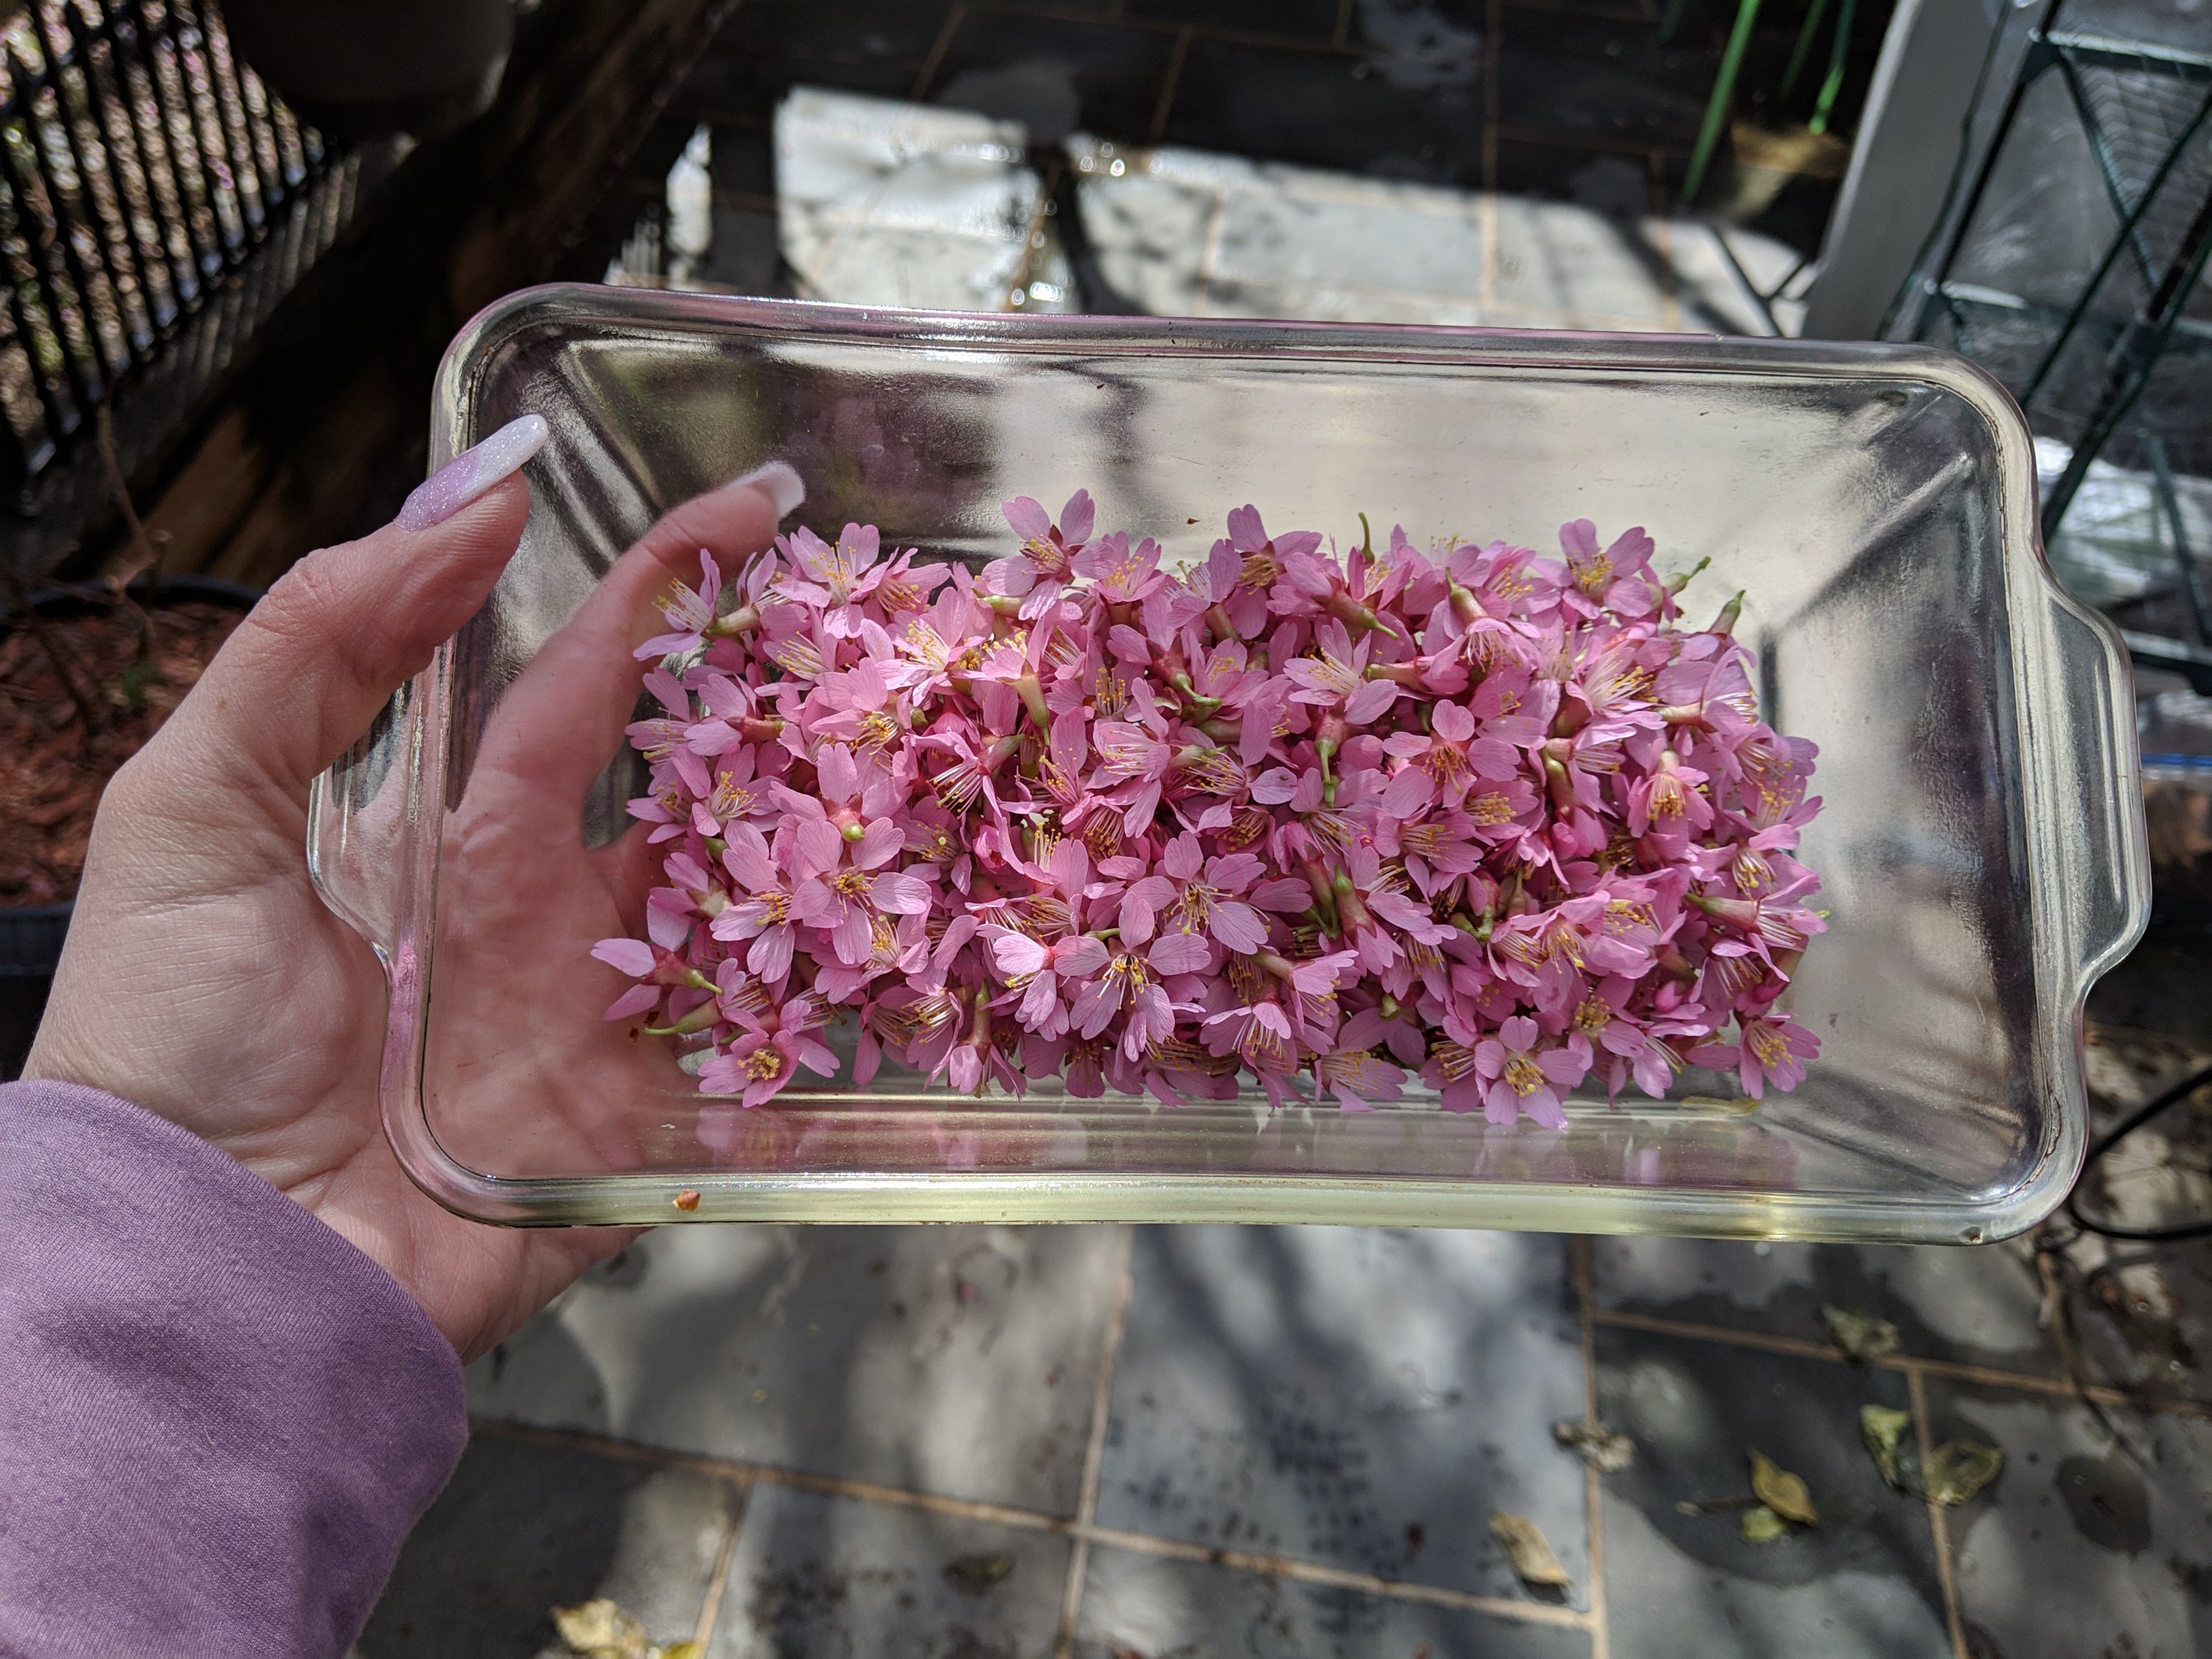
When I asked my herbalism group what I should do with the cherry blossoms the overwhelming majority said I should make a cherry blossom hydrosol…
Well… Sh*t…
Continue readingKnowing how to can rocks! Learning how to can really opened my eyes to a whole different aspect of cooking and I’ve learned so much from it. It also taps into my cheap skate side in that I can take advantage of sales.
Weis was having a huge sale the other day and knowing how to can allowed me to turn this:

Into this:

Sweet Red Bell Peppers were the first vegetable I canned. When I first canned them, I wasn’t sure what I was going to make with them. By the time winter came, I made up a recipe with these marinated peppers and sausage that has turned into one of my favorite winter recipes. Now, I make sure that I have enough cans to last me through the winter. I will make sure that I can about 7-10 jars.
Before I tell you about the recipe, there are a few important notes I have to inform you of. As discussed in “Let’s Talk About: Boiling Water Bath Canning” you can only safely BWB can vegetables if they are pickled or fermented somehow. Also, it is important to note that you should never can with oil; this marinade has oil in it. So, how does this recipe become safe to can if canning in oil is a big no-no?
If you look at the ingredients for the marinade, you will find that it has 2 different acids: lemon juice and vinegar. You’ll also notice that the vinegars are not diluted in water. The original recipe was created and tested safe by The National Center for Home Food Preservation. Now, even though this canning recipe is safe to BWB and the recipe will be shelf stable, NCHFP recommends that it should only be shelf stable for about 6 months. The oil in the recipe can go rancid…because of this many experienced canners choose to just leave out the oil and can the peppers with just vinegar and lemon juice. I understand why they do it because it sucks to lose a jar of food when you’ve put so much work into something. However, I can this recipe as is. The reason being that I don’t can for long term shelf storage (2+ years or longer), I can to preserve the flavor of the seasons. So, I will generally eat the marinated red peppers within 6 months. I have never had a jar go rancid on me (*knocks on wood*).


Marinated Red Bell Pepper
From Well-Preserved by Eugenia Bone
Yield: 3 pints
4 pounds red bell peppers (8 to 10 medium)
1 cup bottled lemon juice
2 cups white wine vinegar (I use regular white)
1 cup olive oil
2 medium garlic cloves, sliced
1 1/2 teaspoons salt
My friends at Pearson Ranch California Oranges helped me out again. Right now they have a combo citrus pack with 10 pounds Oros Blancos and 8 pounds Pomelos.

Oros Blancos are the smaller grapefruit. They are a very light yellow and their fruit is a golden color. They are much sweeter and not as tart nor as sour as Ruby Red or Pink Grapefruit. They are a lovely mild grapefruit that is sweet at the front on your tongue but mildly tart once it hits the back. These would be a great grapefruit for those of you that do not enjoy the brash tartness of the Ruby Reds.

I wanted to can enough to last me a year or more, so I ended up canning all ten pounds of Oros Blancos in heavy mint syrup.
First you want to fill your canning pot with water and add the specific number of 1/2 pint jars to the pot (I needed 8). You will need to sterilize the jars first because these segments will only be in the BWB for 5 minutes.
While your canning pot is coming to a boil, you will want to wash and scrub your grapefruit. Remember the post I did about segmenting citrus? Well, we are going to do that. To all 10 pounds (yes, you can start cursing at me now. Ok, ok, I won’t make you do 10 pounds, I’ll just make you do 5).

Once you segment all the fruit, you’ll have a bowl full of lovely grapefruit segments!

Next you are going to make your heavy minty syrup (the syrup you make for this doesn’t have to be heavy. That’s the beauty of canning yourself, you can make the syrup however you want). The original recipe called for fresh mint but since it’s winter, I used dried mint; 2 tablespoons in a cheesecloth spice bag. Holding the fruit back, tip the bowl over into a 4 cup measuring cup to pour out all the grapefruit juice. Fill the water until you have 4 cups of liquid. Pour this grapefruit juice/water mixture into a medium saucepan and add 2 cups of sugar to your mint. Bring the syrup to a boil, cover, and simmer until you get the minty taste you want; I simmered it for about 20-25 minutes. If your jars have not sterilized by this time, take the mint spice bag out of the syrup and toss it, then keep the syrup simmering until you are ready to can.
Now that your jars are sterilized, place your 1/2 pint jars on a placemat or towel. Working quickly fill the hot jars with your grapefruit segments leaving about a 1/2 inch head space. Then ladle your simmering syrup into the jars up to about 1/4 inch head space.

Run a chopstick around the fruit to release air bubbles, wipe the rims with a damp paper towel, top with lid and ring, and place in your BWB. Once the pot starts to boil, start your time for 5 minutes. After the 5 minutes are up, turn off the heat, and let the jars sit in the pot for 5 minutes. Place on a place mat or towel on your counter. After an hour check the seals, if they have not sealed, place in the fridge and eat within the next two weeks. If they have successfully sealed, let them sit undisturbed overnight. Take off ring, wipe down with a damp towl, label, and place in a dark cabinet until ready to eat.

DO NOT THROW OUT THE EXTRA MINT SYRUP THAT WASN’T CANNED!!! Bottle it and put it in the fridge! We will revisit the mint syrup later!
Grapefruit in Minty Syrup
Adapted from Canning for a New Generation by Liana Krissoff
Yield: 4 half pints
5 Pounds grapefruit
1 Cup sugar
2 Tablespoons dried mint placed in cheesecloth spice bag
Yesterday in the “Let’s Talk About” series, “Let’s Talk About: Boiling Water Bath Canning”, we discussed the reasons why BWB canning works. In order to not make either post huge, I decided to break it down into two parts. Today we are going to discuss *how* to BWB can.
First, let’s look at the equipment you will need. I have a Norpro 18 Quart Porcelain Enamel Canning Pot. However, you don’t necessarily need the same pot as I do. Any very large pot will do. Next you’ll need some sort of canning starter kit, I bought the Back to Basics 286 5-Piece Home Canning Kit. This has everything you’ll need: jar lifter, jar funnel, and magnet pen. You will also need a ladle.


Once your product is ready to can, pull out the jars and carefully pour out the boiling water from the jars. Place your jars on a placemat. For the sake of efficiency and reduction in mess, I always place my product right by my jars. Place your funnel on your jars and start filling. Each recipe is different on how much head space you need to give for a proper seal, so be sure to read the recipe carefully before starting the canning process.


Once all your lids are on, screw on the rings only until they are finger tip tight. You don’t want to crank these on.

Using your jar lifter, place them in your pot, turn the heat back on and when the water comes up to a rolling boil, thats when you start your process time. It will take a little while for the water to come back up to a boil, so be patient. Once the processing time is done, turn off the heat and let the jars sit in the pot for 5 extra minutes. When that 5 minutes is up, pull out the jars with your jar lifter, let any water fall off the top, and place them on a place mat on your counter. You should start hearing the “ping” of sealing jars. After they’ve been cooling on your counter for an hour, you want to check the seal.


This is a long, boring post but it is extremely important. Please read it before you start any BWB canning!
There are several ways that you can preserve your food: freezing, drying, pickling, pressure canning, Boiling water bath (BWB) canning, preserving in oil, curing, and smoking. Most of my preservation techniques center on freezing, pickling, and BWB canning. This year my goal is to expand into drying and pressure canning. I’m not much of a preserving in oil fan as the foods that you preserve in oil become mushy as time goes on and they really don’t last that long. Somethings preserved in oils will only be good for a month or two and if I’m going to put so much time into something, what’s the point? I don’t do curing or smoking, either. It’s just way too easy to buy cured and smoked meats to put the time and effort into curing and smoking. Today, we are going to talk about Boiling Water Bath canning.
BWB CANNING CAN ONLY BE DONE FOR HIGH ACID FOODS!
Let me repeat, BWB CANNING CAN ONLY BE DONE FOR HIGH ACID FOODS!
Ok, now that I’ve gotten that out of the way, let me explain why. Overall, preserving is about prolonging the shelf life of foods by killing or neutralizing the agents that would otherwise cause them to spoil(1). Spoilers are enzymes, molds, yeasts, and bacteria. Bacteria is the big boogeyman of home canning, specifically salmonellae, staphylococcus, and clostridium botulinum.
BWB canning works because water boils at 212. Enzymes die once their host gets heated past 140. Mold and yeast are destroyed from 140-190. However, there are two classes of bacteria. Some bacteria die at temperatures exceeding 240, which is where acid comes into play with BWB. The process of BWB kills all spoilers except clostridium botulinum, HOWEVER, this bacteria cannot thrive in a pH of 4.5 or less. Pickling low acid foods is the only way to safely BWB can low acid foods. Pickling is adding an acid to a food. You can add acid by using a form of vinegar and/or lemon juice (citric acid!) or fermenting the food (3). This is why BWB is safe for foods that have a pH of 4.5 or less (2).
BWB canning also works because as the gass jars are boiling in water, the heat pushes the air out of the tissues and creates a vacuum seal. Without oxygen, spores cannot bloom in your food. The temperature of the boiling water will also sterilize the jars and the foods.
Once you have finished canning an item, you must make sure that the lid is vacuum sealed on. If the lid is not vacuumed sealed on and comes off easily, you must refrigerate it immediately and eat it within 2 weeks. If the seal is strong you can place it on your shelf. When you want to use that food item, always check the seal of that item. If you can lift off the seal easily, you must toss the item. For whatever reason, that item did not preserve correctly and the bacteria have been having a party in that jar. I have been BWB canning for 3 years and have only had 1 canned item spoil on me, so if you follow the rules your chances of failure are miniscule. If, for whatever reason, you have doubts about an item, just throw it out. It’s better to be safe than sorry!
If you are interested in preserving, I highly suggest that you do your own research. Every canner SHOULD have Ball Blue Book Guide to Preserving and Ball Complete Book of Home Preserving. After that, every canner should have the National Center for Home Food Preservation as a favorites link. The National Center for Home Food Preservation stays current on the latest canning research and offers advice and tips. If at any time you read a recipe that you are just not sure about, you can go to NCHP and look up that technique to see if the technique is valid. I highly suggest to add Well-Preserved by Eugenia Bone, Canning for a New Generation by Liana Krissoff, and The Complete Book of Small Batch Preserving by Ellie Topp and Margaret Howard to your canning book library. After that, there are a myriad of canning books out there that you can follow for recipes. Finally, there is a wonderful online forum called Harvest Forum on GardenWeb. The community is extremely knowledgeable, fun, and quick to respond. There are other canning forums but I find that the others tend to promote unsage canning practices and tend to be not as up-to-date on modern canning practices. Harvest Forums members’ primary concern is for your safety, how can you argue with that?
Finally, BWB canning is a highly effective way of preserving food for your family. With the state of corporate canned items being loaded with sugars, MSG, and other non-pronounceable preservatives, you will find that canning your own food items is a much healthier way. Plus, home canned items taste so much better. Once you start, you will wonder why you never did it!
1. Well Preserved, Page 13, Eugenia Bone, Clarkson Potter/Publishers New York 2009.
2. Well Preserved, Page 14, Eugenia Bone, Clarkson Potter/Publishers New York 2009.
3. Canning for a New Generation, Page 15, Liana Krissoff, Stewart Tabori & Change New York 2010.
A blog devoted to food, cooking and recipes I love
Ramblings over 40
A recipe in the making...
Updating Early Modern Recipes (1600-1800) in a Modern Kitchen
You can make these cocktails. Start right now.
Easy authentic middle eastern recipes
Where secrets are kept, problems are solved, hearts are fixed and family is made.
